How to Get Salesforce Contacts into Your Phone with Einstein Activity Capture
Einstein Activity Capture (EAC) is a Salesforce tool for syncing events, contacts, and emails. Having these items synced will boost your productivity and enable flexibility, whether you’re working from your inbox on your computer or while on the go on your cell phone. There are limited things you can do in the Salesforce mobile app, such as click on a Contact and place a call. To that end, you may wish to have Contacts from Salesforce synced to your phone’s native Contacts app. This post will walk you through how to get Salesforce Contacts into your phone.
Step 1: Configure Einstein Activity Capture to Sync Contacts to Google/Outlook
The first task to complete is setting up EAC in Salesforce. To complete this, you’ll need Administrator permissions. Then, go to the Setup menu and navigate to Settings under “Einstein Activity Capture.” Here, enable EAC if you haven’t already. In addition, ensure your Configuration is set up so that the sync direction for Contacts is set either to ‘Both Directions’ or as ‘Salesforce to Google Suite/Outlook’. This will ensure that your Salesforce Contacts sync to Google or Outlook, which is a prerequisite for getting them into your phone’s native Contacts app. At this step, you also have the option to only sync Contacts you own or all Contacts in Salesforce. I recommend limiting the sync to Contacts that you own, as there’s another way to control which Contacts sync in the next step.
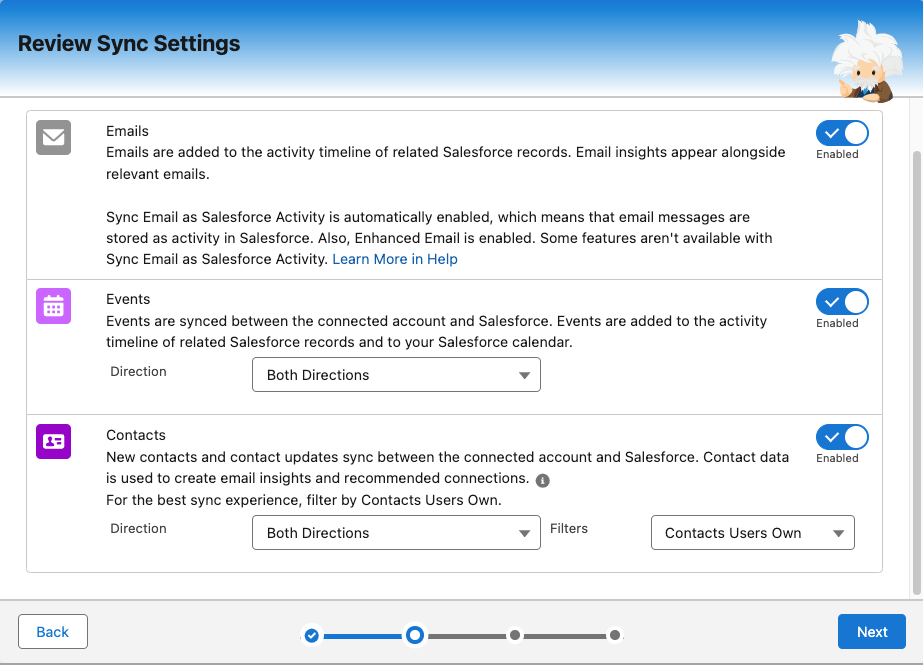
This screenshot shows Contacts have been setup in the Configuration to sync both directions for Contacts that the user owns.
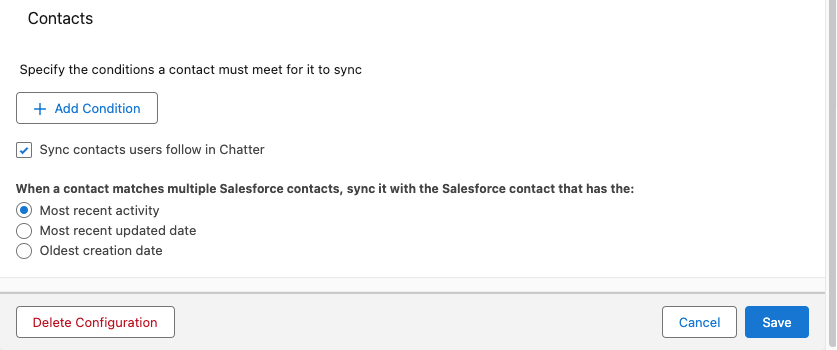
The next step in the configuration wizard enables you to select and sync additional Contacts that you‘re not the owner of. One option is to follow Contacts who you want synced via Chatter. I really like this option because it gives you the flexibility to add more Contacts to sync without ending up overwhelming with tons of Contacts in your Contacts. You also have the option to specify certain conditions, such as using a Contact’s location or assigned territory.
Finish walking through the wizard, and ensure your user is assigned to the EAC Configuration you just created. Also, ensure your user has the correct “Standard Einstein Activity Capture User” Permission Set License and Permission Set. The full EAC Admin Setup guide can be found here.
Step 2: Ensure Contacts Are Syncing from Salesforce to Google/Outlook
Now, navigate back away from Setup and back to your standard Salesforce screen. You should see a banner across the top to finish setting up EAC. You’ll be prompted to give Salesforce access to your Google/Outlook account. Complete those steps.
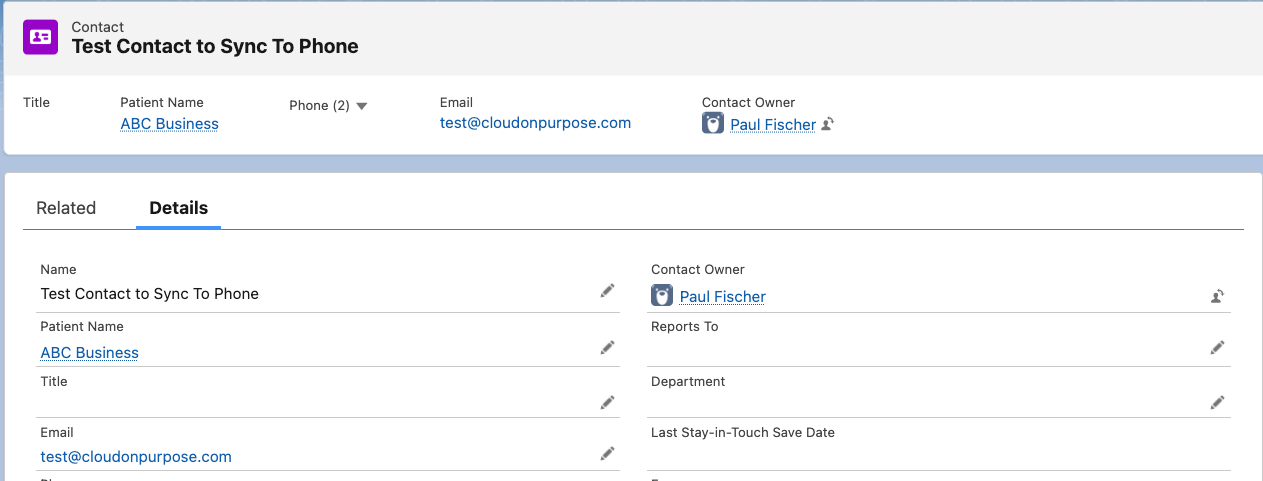
This is a screenshot of a test Contact record I created in Salesforce to see if this sync works.
Next, navigate to your Contacts on Google or Outlook. You should see that a “label” named “Salesforce Sync” has been created. There, you should see the Contacts that you own in Salesforce or follow in Chatter! If not, give it 10 minutes after your initial setup.

This screenshot shows the Google Contacts page with a “Salesforce Sync” label. The list of Contacts is blurred out except for the test Contact that successfully synced from Salesforce.
Step 3: Connect Your Phone to Your Google/Outlook Contacts
The last step is to connect your phone with your Google/Outlook Contacts. Using an iPhone, you can do this by going to Settings (icon with a gear). Scroll to the bottom and find “Apps,” then “Contacts.” Click “Contacts Account” and then “Add Account.” Enter the credentials for your account. Give it a couple of minutes, and then you will have your Contacts from Salesforce in the native Contacts app on your phone!

Click Add Account on this screen.

Then, choose Google or Outlook and ensure you enable Contacts.

Open the native Contacts app, and you should see your Salesforce Contacts there.
If you have any questions or need further guidance, drop me a comment below, and I’ll do my best to help!